30th anniversary for metrology specialist

Midland Metrology says it is marking the company’s 30th anniversary this year with continued growth and expansion.
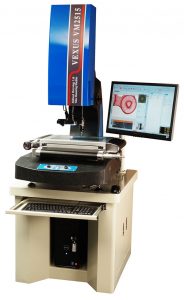
Trading locally, nationally and internationally, the company is a supplier of both new and used precision measuring equipment. A Midlands-based showroom hosts a wide variety of machines, including profile projectors, video machines, hardness testers and granite products, all available to view and demonstrate.
Having recently taken on three new members of staff, Midland Metrology is announcing the launch of its new, purpose-built inspection room, which is in addition to the company’s existing inspection and calibration facility. The latest addition to the team, Andy Holt, formerly of AC Inspection, will be heading up the new inspection department. He has a total of 25 years’ experience in quality and inspection, and with his knowledge and expertise in this field, is well equipped to run the new department.
All types of subcontract inspection and measurement work is undertaken by Midland Metrology, including machined parts, pressings and fabrications. The service includes fully detailed spreadsheet reporting. The company says it happy to discuss any specific requests and solve any measurement issues.
Midland Metrology’s showroom in Coventry is within easy reach of the M6, M1 and M40 motorways. Visitors can come along and meet team members, who will be pleased to demonstrate the company’s capabilities and discuss any inspection and measurement requirements. All quotations are provided without obligation.
For further information www.midland-metrology.co.uk

Sino-UK smart metrology centre

The University of Huddersfield’s £40m EPSRC Future Metrology Hub has joined Shanghai University to build a new Sino-UK smart metrology centre in China
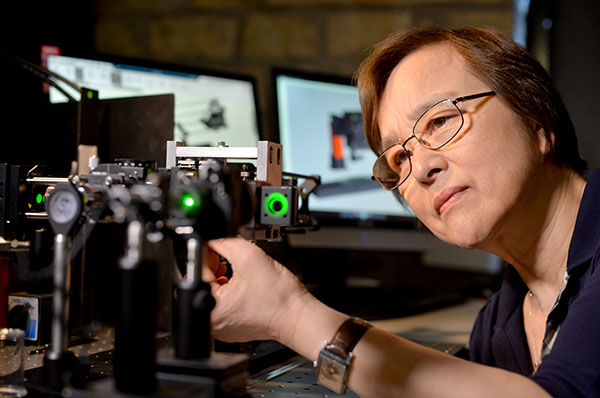
Senior delegates from Shanghai Jiao Tong University (SJTU), including its vice president professor Xi LiFeng, recently paid a fact-finding visit to the EPSRC Future Metrology Hub, located in the University of Huddersfield’s Centre for Precision Technologies, and met its director and professor of precision metrology, Dame Xiangqian (Jane) Jiang (pictured).

University of Huddersfied, Director of the Future Metrology Hub, Professor Jane Jiang.
11.09.17

During the visit, the University of Huddersfield’s vice chancellor, professor Bob Cryan, signed a memorandum of understanding with professor Xi. The memorandum laid a grounding for future international co-operation in scientific research and exchange programmes for students and teachers to take place between the two institutions in the field of metrology. Also planned in the near future is a visit to SJTU by professor Cryan and the university’s pro-vice chancellor, international, professor Dave Taylor.
Professor Xi expressed his university’s keen interest in building a collaborative centre in Shanghai with the EPSRC Future Metrology Hub.
“The Future Metrology Hub is a leading research centre in metrology whose expertise is well recognised in academia and industry,” he said. “SJTU, with its strengths in engineering, is looking forward to complementing research interests and strengths with the University of Huddersfield’s Future Metrology Hub to build a world-class metrology centre in Shanghai that can serve the manufacturing industry in China and the UK.”
According to the 2018 Academic Ranking of World Universities, SJTU is 29th in the world for engineering, while also being one of China’s top research-oriented institutions, and the University of Huddersfield said it was honoured to welcome its visitors to the campus.
For further information https://research.hud.ac.uk

Optical co-ordinate measuring system unveiled

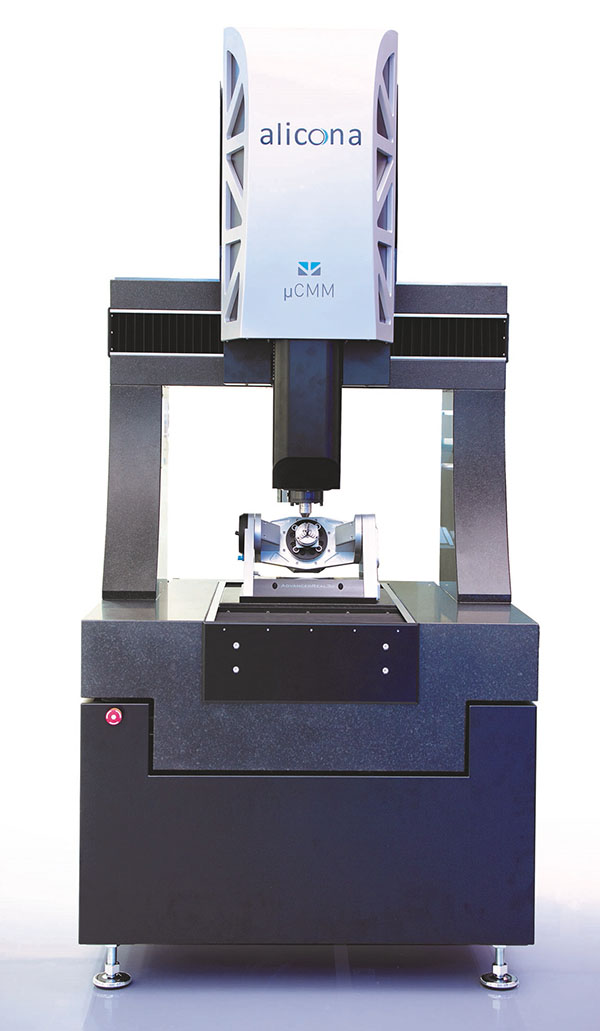
Alicona has unveiled its latest optical 3D focus-variation measuring instrument, the µCMM.

The µCMM has been designed to be the most accurate, purely optical micro-coordinate measuring system in its class. Users combine advantages from tactile co-ordinate measuring technology and optical surface measurement to measure the dimensions, position, shape and roughness of components with just one sensor. The µCMM is said to offer high geometric accuracy of several optical 3D measurements in relation to each other, enabling the measurement of small surface details, including precise determination of position, in a short time.
Users measure both surface roughness and GD&T features with tolerances in the single-digit µm range. The spectrum of measurable surfaces includes all common industrial materials and composites, including matt and polished reflective components. Simple operation is implemented by single-button functionality, automated measuring sequences and ergonomic operating panels. Air-bearing axles with linear drives enable wear-free use and high-precision, fast measurement.
The Alicona µCMM is designed for easy, flexible and expandable use by multiple operators.
This ambition is implemented by a series of options that extend the application range of the optical CMM and maximise fields of use in production measurement technology.
The motorised ‘Real3D Rotation Unit’, for example, turns the three-axis system into a five-axis system and enables
users to measure components from several, arbitrary perspectives. This capability allows contactless measurement of surface features such as flank angle, chamfer angle, thread pitch or undercuts.
For further information www.alicona.com

Fast countersink measurement routines

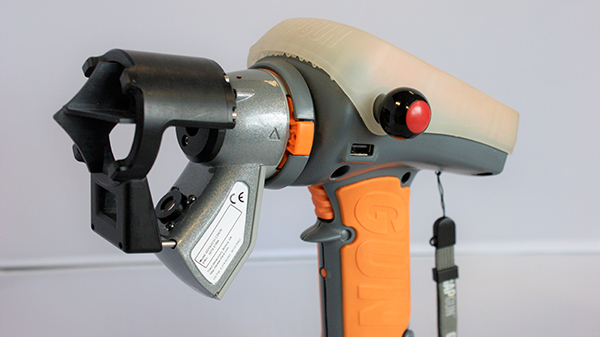
Third Dimension has launched a countersink measurement solution for its GapGun range.

SONY DSC

Said to be the first of its kind on the market, the solution can calculate the dimensions of a countersink hole to accurately predict the flushness of fasteners once fitted. What’s more, the innovation can operate in real time on the production lines of aircraft, cars and vans, and in energy and marine markets.
Last year, in the commercial aerospace industry alone, some 1481 planes were manufactured with a total estimated 296 million countersinks. The average requirement is to measure 5% of each aircraft’s 200,000 countersink holes, meaning 10,000 countersink holes would have to be measured for every commercial aircraft produced. Done manually, these checks rely heavily on the competencies of the operator and are extremely time consuming. Conversely, Third Dimension’s patented systems takes just a couple of seconds per measurement, with no possibility of operator error.
The GapGun Countersink Inspection System enables the prediction of fastener flushness much faster and more accurately than mechanical gauges, with the addition of an auditable data trail. Importantly, tolerance bands can be preset, against which the measurement is recorded, before the result can be read on screen or automatically sent to a PC to enable comparison and analysis.
Countersinks are notoriously difficult to measure; one of the main challenges for manufacturers is finding a way that considers how to calculate the centre of the hole. The Third Dimension solution addresses this issue with a specially designed stand-off integrated into the sensor that enables the system to calculate the hole centre and therefore check the required dimensions before the fastener is fixed in place.
For further information www.third.com

Laser scanning halves inspection times

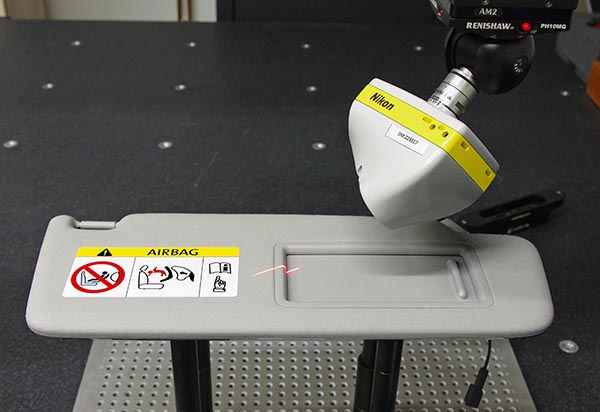
Czech company Lukov Plast, a producer of injection moulded plastic parts, electronic components and electrical sub-assemblies for the automotive industry, reports considerably faster inspection cycles and feature measurements following the purchase of a Nikon Metrology LC15Dx laser scanner.

Miroslav Pavlu, measuring technician at Lukov Plast, explains: “To manufacture assemblies and components that will withstand regular daily use, parts are subjected to various life cycle and climatic tests, as well as quality assurance (QA) procedures and analysis to assess performance. Previously, QA involved using various manual gauges and taking touch-probe measurements on a co-ordinate measuring machine. Larger plastic parts, in particular, were problematic to inspect using tactile techniques as they were difficult to clamp without distortion.”
To control the production of injection mould tools so that manufacturing processes could be steered correctly from the outset, as well as to measure the plastic parts produced, it was decided that inspection needed to be faster, more efficient and more accurate. The ability to check a part against the CAD model and highlight areas of concern using colour mapping was another reason to consider investing in newer technology.
An upgrade from Nikon Metrology proved to be best solution due to its cost effectiveness and the supplier’s experience of retrofitting to third-party systems. Additionally, Nikon’s LC15Dx laser scanning technology with Focus point cloud software was considered best-in-class.
Pavlu says: “The laser scanner has accelerated measurement by about 50%, while and the creation of programs for new parts is about 40% quicker. Costs are also lower due to the use of less dedicated fixtures than are needed for traditional tactile inspection.”
For further information www.nikonmetrology.com